

Painting playground game markings is a fantastic way to transform a plain blacktop or concrete play area into a vibrant, engaging space for children. From hopscotch grids to sensory paths and four-square courts, adding durable paint to your school playground can encourage physical activity, social interaction, and creative play. However, choosing the right type of paint, as well as applying it correctly, is crucial for long-lasting, safe, and colorful results. In this comprehensive guide, we’ll explore the main types of paint suitable for playground games, how to prepare and paint different surfaces, application and curing best practices, safety and environmental tips, plus how to care for the reusable stencils that make creating these games a breeze.
Table of Contents
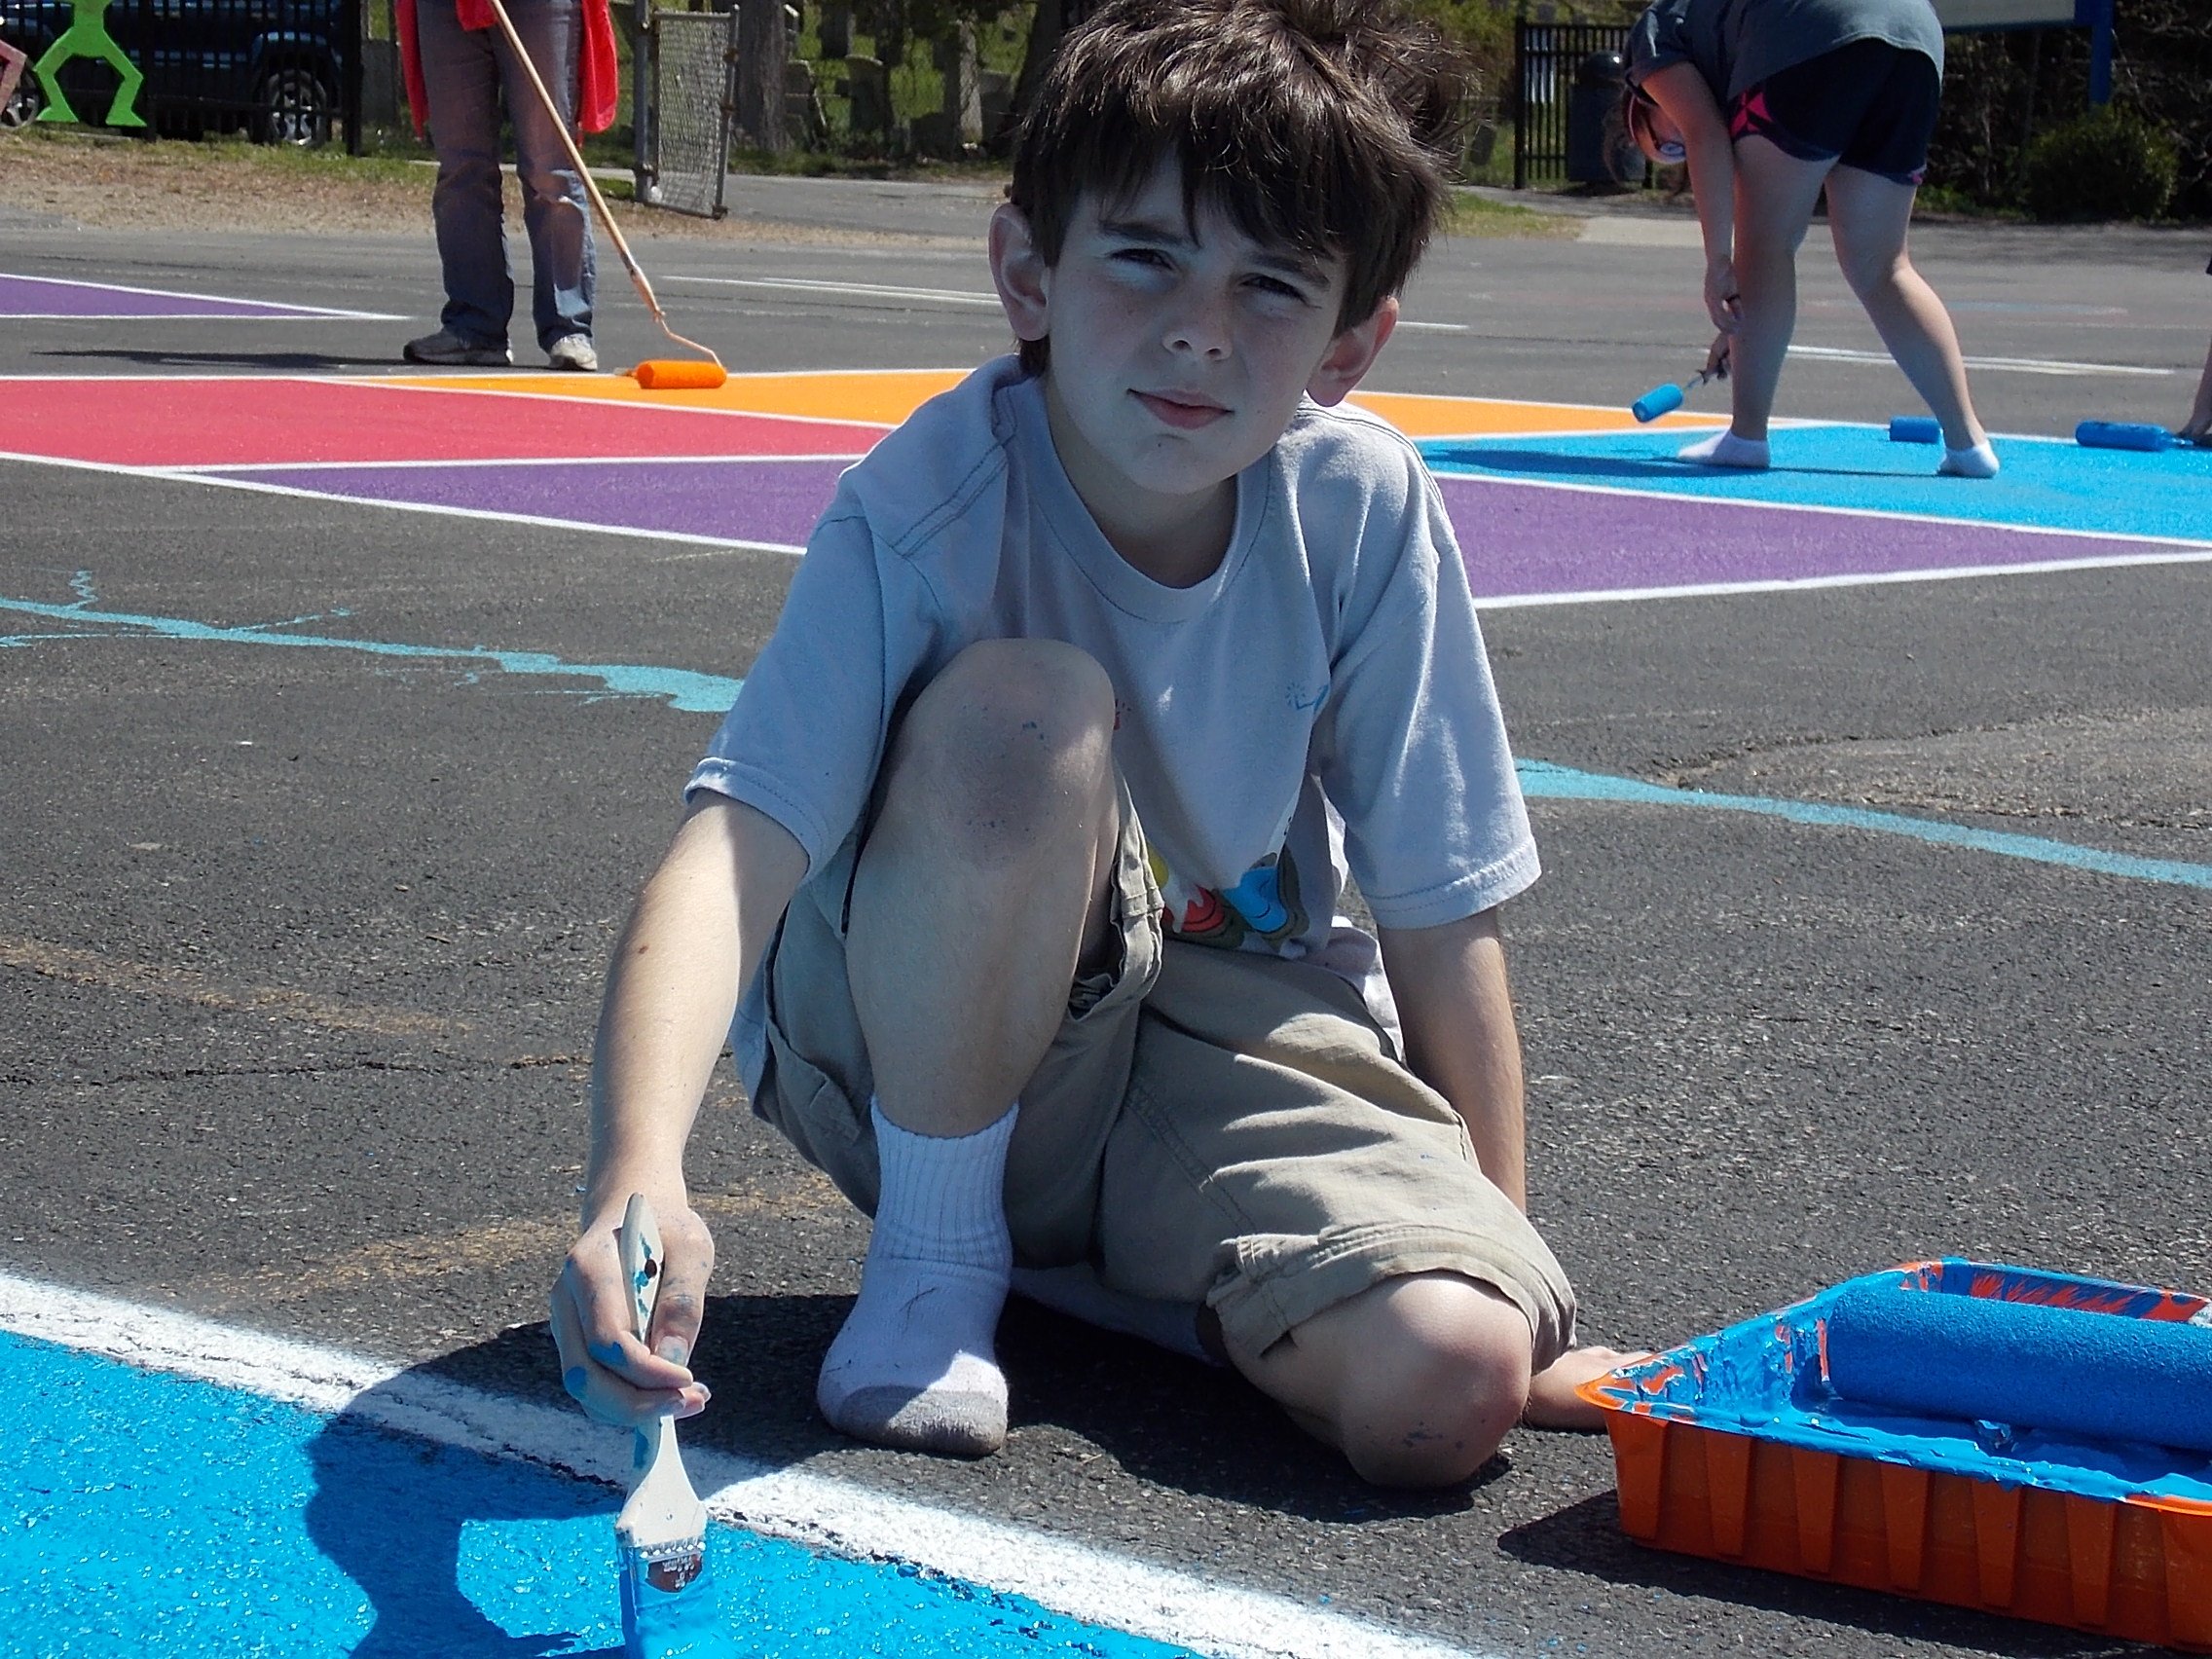
 A brightly painted Daisy Hopscotch® game on an asphalt playground, created with durable pavement paint. Such colorful playground markings capture children’s attention and encourage active play.
Types of Paint for Playground Game Markings
When it comes to painting playground games on asphalt or concrete, three main paint options are commonly used: liquid acrylic/latex paint, spray paint, and professional pavement paint (like Sherwin-Williams). Each type has its own application method, advantages, and ideal use cases. Choosing the right one depends on your project’s needs, your budget, and the surface you’re working with - visit here for more on this! Below we break down each paint type and their pros and cons to help you make an informed decision.
1. Liquid Acrylic/Latex Paint (Water-Based)
Liquid acrylic or latex paint is 100% a go-to option for long-lasting playground game markings on asphalt and concrete. Many schools and contractors default to off-the-shelf porch and floor paints from big-box retailers like Home Depot due to their affordability and availability. However, those products often fall short when it comes to long-term durability under heavy foot traffic and outdoor exposure.
A more professional and proven approach, which has been historically used by experienced installers and DIYers, is to apply a combination of Sherwin-Williams’ Pro-Park® Traffic Marking Paint and H&C® Water-Based Concrete Stain. These waterborne acrylics are designed specifically for exterior pavement and concrete use and offer greater longevity, adhesion, and visual consistency across large, multi-color playground projects.
Pros of Liquid Acrylic/Latex Paint:
- Pro-Grade Durability: Sherwin-Williams’ Pro-Park® paint is a waterborne acrylic alkyd formulated for roadways and parking lots. It’s built to withstand harsh conditions and heavy foot traffic, making it ideal for schools. When paired with H&C® Concrete Stain, you get excellent coverage on concrete surfaces, especially when colors outside the Pro-Park range are needed.
- Expanded Color Matching: One of the limitations of traffic marking paints like Pro-Park is a narrow pigment selection (mostly yellow-pigment-based options like orange, yellow, and green). To expand your palette, using H&C® stain alongside Pro-Park allows for an expansive color range, enabling you to achieve vibrant blues, reds, purples, and other specialty tones with high fidelity across all game elements.
- Water-Based and School-Safe: Both paints are low-VOC and waterborne, making them easier to clean up and safer to use around children. This makes them a strong fit for schools prioritizing environmentally conscious materials without compromising on quality.
- Works on Asphalt and Concrete: Pro-Park is marketed for asphalt, while H&C concrete stain is aimed at concrete surfaces; however, both have exceptional performance on both asphalt and concrete alike —making the combo effective for schools.
Cons of Liquid Acrylic/Latex Paint:
- Requires Multi-Product Coordination: Using both Pro-Park and H&C may require purchasing from different Sherwin-Williams product lines and understanding how they interact. It's important to ensure even finishes when using both across a single playground. They can be next to each other but not mixed together.
- Curing Time Still Matters: While water-based, both paints still need proper dry and cure times. You’ll need to follow manufacturer recommendations to avoid premature wear. Dry to touch is not fully cured, so overnight closures are often necessary.
- Anti-Skid Considerations: Pro-Park occasionally comes with a built-in anti-skid, but H&C may not. For larger solid game areas, an anti-skid additive to maintain slip resistance is very important but there is benefit to adding this to smaller games as well. Sometimes it is added at the store and sometimes it will need to be added manually, at time of painting.
Best Use Cases: This two-paint method is ideal for schools looking for long-term durability, vibrant range of colors, and slippage control. If your playground designs involve more than just primary colors, or if you're working across both concrete or asphalt, using Pro-Park® and H&C® stain for specialty colors gives you the best of both worlds. This combo has been field-tested with success in real school environments and is preferred by both experienced playground painters and inexperienced volunteers over generic porch and floor paints.
2. Spray Paint (Aerosol Cans)
Spray paint offers a different approach – instead of rolling or brushing, you spray the paint from an aerosol can. Spray paint kits for playground markings are typically sets of vibrantly colored cans. This option is appealing for small stenciled graphics or quick projects, and it’s often the most economical upfront. Spray paints used for playgrounds are usually water- or oil-based enamels that dry quickly.
Pros of Spray Paint:
- Quick and Convenient: Spray paint comes ready-to-use, so no mixing or rollers required. Simply shake the can and spray. This can significantly speed up the painting process, especially for simple shapes or stencils. You can cover a lot of small markings in a short time, making it ideal for volunteer painting days or when time is limited.
- Minimal Equipment Needed: Since the paint is in self-contained aerosol cans, you don’t need trays, brushes, or rollers. Fit and Fun’s spray paint kits, for example, include just the spray cans (no extra supplies). This means less to set up and less to clean up afterward, since you simply dispose of the empty cans properly.
- Fast Drying: Spray paints tend to be thin coats that dry very fast. Often, sprayed markings will be dry to the touch within minutes. This quick drying can help if you need to layer colors or apply a second coat; you won’t wait long compared to liquid paint. It also means less risk of someone accidentally stepping in wet paint if the area can’t be closed off for long.
- Great for Stencil Details: For intricate stencil designs or lettering, spray paint can be very effective. A light mist can reach into small corners without puddling. As long as you take measures to control overspray, you can get crisp results on things like compass roses, alphabet games, or detailed logos.
Cons of Spray Paint:
- Overspray and Masking: One of the biggest challenges is overspray – the fine mist can drift beyond your stencil or target area. You’ll need to spend time masking off the surrounding pavement with newspaper, cardboard, or drop cloths to protect from overspray. Windy conditions in particular can carry spray paint where you don’t want it. This means prep time for taping down protection, which can offset some of the convenience of spraying.
- Health and Safety Precautions: Spray paint is an aerosol, so it must be used outdoors or in well-ventilated areas. Anyone spraying or near spraying should wear a mask rated for paint fumes and consider eye protection. The propellants and solvents in some spray paints can be hazardous to inhale, and certain solvents might even damage plastic stencils if incompatible. (Fit and Fun advises testing a small area of stencil material with your chosen spray paint, since some aggressive solvents could degrade the stencil) In short, while spraying, keep kids away, and ensure the painter is protected.
- Less Durable Coating: Generally, the layer of paint from a spray can is thinner than what you can achieve with rolled-on liquid paint. This can mean that spray-painted markings may not last as long under heavy foot traffic or harsh weather. They might fade faster or require touch-ups sooner, especially on asphalt where UV and wear are factors. Using high-quality outdoor spray paints can mitigate this, but it’s unlikely to outlast a good pavement-grade liquid paint in longevity.
- Cost for Large Areas: While spray cans are cheap individually, painting a large solid area (like the center circle of a court or a long track lines) would require many cans, which can add up in cost. Spray kits are great for small games and accents, but for covering big surface areas, liquid paint applied with a roller is usually more cost-effective and consistent.

Best Use Cases: Spray paint is best for small-scale projects or adding details. If you’re painting a few hopscotch courts or a handful of playground game stencils and you want to involve volunteers or even older students in a quick project, spray cans can work well. They’re also useful for touching up existing markings or adding colorful details to an already painted design. Schools on a tight budget may opt for spray kits to get initial games painted and then plan to repaint more thoroughly as it will wear off quicker. Just remember to take safety precautions and do careful prep to avoid unwanted splatter. When used correctly, spray paint can deliver bright, fun playground graphics at a lower cost and effort barrier to entry, albeit with a bit more frequent maintenance down the road.
3. Poured-in-Place Rubber Compatible Paint (For Rubber Playground Surfaces)
While most playground paint applications focus on concrete or asphalt, poured-in-place rubber (PIP) surfaces require a completely different approach due to their elasticity, texture, and porosity. If your school or facility includes areas with rubberized safety surfacing, which is commonly found under playground structures, you’ll need a specialized coating like Qualipur 7611.
This water-based, low-VOC coating is specifically designed for athletic and resilient surfaces, providing excellent adhesion, flexibility, and color retention without compromising the safety and bounce characteristics of the rubber.
Pros of PIP-Compatible Paint:
-
Designed for Rubber, Not Pavement: Unlike traffic paints or concrete stains, Qualipur 7611 is built to bond with the flexible, non-rigid structure of poured-in-place rubber surfaces, reducing the chance of cracking or flaking over time.
-
Safe & Durable: With a VOC rating of <2 g/L, it’s among the most environmentally conscious options for playgrounds. It also handles abrasion well, which is great for high-traffic areas.
-
Quick Curing Time: Foot traffic is allowed within 3 hours, with a full cure in 16 hours, which is absolutely ideal for busy schoolyards with limited closure windows.
- Flexible Application Options: Can be applied with a ½" microfiber roller or airless sprayer. Spray application is especially useful for large-scale areas like multi-lane tracks or hopscotch overlays on rubber surfaces.

Cons of PIP-Compatible Paint:
- Not Compatible With Concrete or Asphalt: This paint is only suitable for rubberized surfacing and should never be used on traditional hardscapes.
- Special Order Product: This isn’t available at standard hardware stores. You’ll need to order through specialized vendors like No Fault, LLC for example, or consult your project partner to ensure the right formulation and application.
- Color Matching Considerations: Available color options may be more limited compared to standard liquid paints or stains. Consult your installer for matching the playground’s design palette.
- For Experienced Installers Only: This product should only be used by experienced installers. This is not a good choice for most DIYers. And before any use, you will need to ensure the paint is compatible with the PIP surface and check the warranties of the PIP to ensure the paint will not invalidate any warranties.
Best Use Cases: Poured-in-place rubber compatible paint is the best solution for schools and parks that offer extremely resilient rubber safety surfacing beneath play structures, trike paths, or sensory areas. Many early childhood play areas rely on rubber for safety, and this paint allows for vibrant visual features that won’t crack or peel like standard pavement coatings. It’s also an excellent option for refreshing faded markings, such as hopscotch grids, pickleball courts, or shape sequences, where rubber has already been painted. For schools with mixed surfacing types, this paint pairs well with traditional pavement paints, allowing for a cohesive game layout across both rubber, concrete, and asphalt zones. Whether you're designing new visuals or maintaining existing ones, this paint offers a professional, surface-safe way to extend engagement across all zones of your playground.
Surface Compatibility and Preparation
Now for the main event – painting your playground games! With your surface prepped and your chosen paint type in hand, follow these detailed application guidelines to get the best results. Whether you’re using liquid paint or spray, a careful application will make the difference between a messy job and a beautiful playground mural.
General Application Tips (All Paint Types):
-
Work Methodically: It’s usually best to paint one game at a time (finish all coats of your hopscotch before moving to the four-square, for example). This focused approach helps you keep track of drying times and avoid stepping in wet paint accidentally while doing another area. If you have a team, you can assign different games or sections to each pair of painters to work in parallel – just make sure they don’t track through each other’s work zones.
-
Use Stencils and Guides: If you have purchased Fit and Fun Playscapes' reusable playground stencils, follow the included application instructions carefully. Secure the stencil to the ground so it doesn’t shift – this can be done with painter’s tape or weights at the corners (some stencils have built-in handles for helpers to hold down). Make sure the stencil lies flat against the surface to prevent paint from seeping under edges. If you’re painting freehand designs or lines, use chalk lines, tape, or string to guide you. A little extra time spent securing stencils or tape will result in much sharper lines and shapes.

-
Thin, Even Coats: No matter the paint, avoid "glopping" on a thick coat in one pass. It’s a recipe for drips, uneven drying, and poor adhesion. Instead, apply a thin coat first – it might look a bit transparent or uneven, but that’s okay. Let it dry according to instructions (usually until it’s dry to the touch) and then apply a second coat for full opacity. Two thin coats are far better than one thick coat. This approach prevents issues like paint pooling or forming a skin on top that peels later.
Liquid Painting vs. Spray Painting
When Using Liquid Acrylic/ Latex Paint: Pour some paint into a tray or bucket and use a medium-sized roller for larger stencil areas and a brush for smaller sections. A common technique for stencils is “stenciling” with a dabbing motion: instead of brushing side-to-side (which can push paint under the stencil edges), use a straight up-and-down dabbing or gentle tapping motion with the brush or a sponge applicator. This is especially useful for intricate patterns, letters, or numbers, as it keeps the edges clean. For larger open areas, rolling is fine – just don’t overload the roller. Offload excess paint from your roller or brush by rolling it out on the tray a bit, then apply. If you see paint starting to puddle or creep under the stencil, you’re using too much at once. Also, be mindful of paint collecting on stencil edges; if you notice buildup, pause and wipe it off before continuing.
Many stencil users like to have a damp rag or sponge on hand – after completing each section or lifting a stencil, immediately wipe off any paint on the stencil itself, especially along the edges of cut-out shapes. This prevents dried paint from accumulating on the stencil, which could make subsequent uses messy or less precise. Fit and Fun stencils come with a thin film layer you can peel off after painting to make cleanup easier, but if yours doesn’t, manual wiping is key. The general rule is clean the stencil before the paint dries on it. If paint does dry on your stencil, you might gently use a recommended solvent or cleaner – but test it on a corner of the plastic first to ensure it doesn’t melt or weaken the stencil material.
Work with one color at a time, and allow each color to dry before repositioning stencils for the next color. For example, if your design has a blue circle and then white numbers on top, paint the blue circle, let it dry sufficiently, then lay the stencil for numbers. Placing stencils on tacky paint can smudge your work and transfer paint onto the stencil’s backside. Patience is key – use the drying time to clean up tools or prepare the next stencil.
When Using Spray Paint: Shake each can vigorously as directed (usually about 1-2 minutes) to ensure paint is well-mixed. Hold the can about 6-8 inches from the surface for most pavement sprays – check the can instructions, as distance recommendations can vary. Crucial: control overspray. It’s wise to have one person spray and another person holding a piece of cardboard right at the stencil’s edge, moving along as a shield. This creates a barrier so that spray doesn’t drift beyond the stencil cut-out. If you’re solo, you can tape down newspaper around the stencil perimeter. Also, spray lightly in bursts rather than one long blast in the same spot. Start moving your arm before you press the nozzle and release the nozzle before you stop moving – this avoids heavy paint at the start or end of a spray pass, which can cause drips. For very sharp edges, you might hold the can more vertically above the stencil (to minimize angled spray getting under edges).
Spray paint dries fast, but be careful not to track it. You might not see wet paint if it misted beyond your expected area. It’s a good idea to wear old socks or booties and periodically check your shoes so you’re not unknowingly stepping in paint and then walking around. Use caution tape or cones to cordon off the work area—sometimes a light spray can travel a surprising distance if it’s windy, and you don’t want curious kids wandering nearby until you’re done and the area is safe. And all painters and people nearby observing, should wear a mask in accordance with instructions.
Curing and Drying:
After application, the paint needs time to cure fully. “Dry to touch” is not the same as fully cured. Curing means the paint has reached maximum hardness and adhesion. Always refer to the paint can for recommended cure times before heavy use. As a general guideline: many water-based pavement paints are dry to touch in 30-60 minutes on a good day, and can handle light foot traffic in a few hours, but they may take 24+ hours to cure hard. Plan to block off the playground overnight or for a full day after painting. This may involve coordinating with custodial staff or scheduling the painting just before a weekend or holiday so the paint can set undisturbed.
For example, Sherwin-Williams’ traffic paint data sheets often say things like “open to traffic in 2 hours” under ideal conditions, but that refers to vehicles on road stripes. For kids running and scuffing, it’s wise to err on the side of a longer cure. In practice, many schools paint on a Friday and reopen the playground Monday, giving plenty of time. At minimum, ensure a solid overnight dry. You can test an inconspicuous area with your fingernail, as in if you can dent the paint easily, it’s not cured yet.
Also important during curing: "weather vigilance". If an unexpected rain shower is possible, cover the painted areas and areas around the painted areas with tarps (without letting the tarp touch wet paint if you can manage) or postpone altogether. Conversely, very strong sun and heat can sometimes cause issues like bubbling if the pavement outgasses. Many prefer painting in the morning or late afternoon to avoid peak sun.
Once cured, your painted playground games should be tough and ready for action! You’ll notice that high-quality paints with proper curing will bond strongly – you shouldn’t be able to scratch them off easily with a fingernail. Before releasing kids to play, do a quick walkthrough: ensure no paint is still tacky or coming up. Remove any remaining masking tape or materials you used. If you see any minor flaws (like edges where paint bled or a stencil misaligned), you can touch them up with a small brush now that everything is dry.
Maintenance and Care for Reusable Stencils
Investing in reusable playground stencils is a smart move for schools – they allow you to paint professional-looking games and then use the same stencils again for touch-ups or new projects. To get the most out of your stencils (and keep them in good shape for years), it’s important to clean and store them properly. Here are some maintenance and care guidelines:
- Clean Immediately After Use: As soon as you finish painting with a stencil, take a few minutes to clean off any wet paint before it dries. Liquid paint tends to pool along the stencil edges and in any small details of the design. If that paint dries hard, it can clog the cut-out areas or create raised globs that prevent the stencil from lying flat next time. While the paint on the ground is drying (and you’re waiting to do a second coat or color), use that time to gently wipe the stencil. Use a rag or paper towels dampened with water (for latex paint) or the appropriate cleaner recommended for the paint. Avoid strong solvents like acetone unless the stencil manufacturer explicitly says it’s safe – some plastics can be damaged by solvents. If a cleaner is necessary (for example, some aerosol paints might require mineral spirits), always test on a corner of the stencil first to ensure it doesn’t soften or crack the material.
A gentle brush (like a dish brush or soft scrub brush) can help remove paint from textured stencil surfaces or small cut-outs. Be careful not to bend or rough up the stencil during cleaning – support it on a flat surface or against a wall while scrubbing.
- Use the Protective Film (If Provided): Some reusable stencil kits (such as Fit and Fun’s) include a thin film coating or adhesive mask on the stencil. This is essentially a disposable layer that covers the stencil’s cut-out areas while you paint, catching the paint spray or drips. After you finish painting, you peel off this film and most of the mess comes off with it, leaving the stencil itself relatively clean. If your stencils have this, take advantage of it! It makes cleanup super easy. Just be sure you remove and dispose of the film after use – leaving a paint-caked film on and letting it dry for days will make it harder to remove later.
- Avoid Over-Flexing the Stencil: High-quality stencils are usually made from durable plastics (like polyethylene or polypropylene) that can flex somewhat, but they can still crease or crack if mistreated. When cleaning or moving the stencil, handle it gently. Try not to crease it sharply. If a stencil has large, delicate sections (for example, a thin bridge between two parts of a design), be mindful of those – don’t pull on them too hard while cleaning. If you have to transport the stencil, roll it in a large diameter roll (not a tight roll) or keep it flat between pieces of cardboard.
- Dry and Store Properly: Before storing stencils, make sure they are fully dry. Storing a stencil with moisture (or bits of paint you missed) and stacking others on top can lead to sticking or mold growth over time. Once clean, let each stencil air dry or wipe it down thoroughly.
For storage, flat is best. If you have a large flat drawer or can slide them under a table, that keeps them straight. Many schools choose to hang stencils on a wall or dedicated rack using binder clips or clamps on the edges – this keeps them flat and makes them easy to find. If the stencil is huge and rolling is the only option, roll it loosely and stand it upright so nothing heavy gets set on it. Do not fold a stencil, as creases could become permanent and distort the design. Fit and Fun’s guidance is to open and unroll stencils immediately upon receipt and store them unrolled, which shows how important flat storage is for longevity.
Also, keep stencils in a moderate environment. Extreme heat could warp the plastic, and extreme cold could make it brittle. So, the shed that goes from 110°F in summer to below freezing in winter might not be ideal. A custodial closet or storage room indoors is preferable.
- Longevity and Reuse: With good care, commercial-grade stencils can be reused many times. After use and cleaning, inspect your stencil for any damage. Small nicks or cracks at the edges usually won’t affect the painted result, but if a chunk of the design is broken, you might need to repair it. A common hack: if a stencil piece breaks, you can sometimes tape it back in place on one side with duct tape or Gorilla tape, essentially creating a hinge that holds it together during painting. However, if major pieces are missing or warped, it might be time to replace that stencil. Try to avoid getting to that point by gentle handling each time.
One thing to watch for is gradual paint buildup. Even with diligent cleaning, over time a little paint might accumulate at the very edges of shapes. If you notice your stencil getting heavier or edges not as sharp, you can gently scrape off accumulated layers (lay it flat and use a plastic scraper or old credit card to chip away built-up paint blobs). Do this carefully to not gouge the stencil material.
- Maintenance of Painted Markings: While here, it’s worth noting how to maintain the painted games themselves. Over the months and years, regular sweeping and washing of the playground will help the paint stay bright. Dirt and grime can dull the colors, but a clean surface lets them pop. If you used quality paint, you likely won’t need to repaint for a long time, but high-traffic areas might start to fade or wear. Keep some leftover paint (well-sealed and stored in a climate controlled area) from your project for touch-ups. Your stencils will come in handy for this – you can realign them and repaint worn sections as needed. Many schools plan a touch-up day every 1-2 years to keep the playground looking fresh. It’s much easier to refresh existing designs (with stencils) than to do the initial painting, so maintenance is usually a light lift.
By taking care of your stencils, you ensure that every time you need to repaint or add new games, your tools are ready to go. It protects the investment and extends it – instead of a one-time use, you’re set for countless reuses. Plus, well-maintained stencils produce the cleanest graphics, which means your playground games will continue to look crisp and inviting for the kids each time you repaint. As Fit and Fun describes, with proper maintenance their stencils “can be reused numerous times” – which is both cost-effective and convenient for schools. So a little TLC for your stencils goes a long way in keeping playtime fun and colorful!
.jpg?width=2736&height=1824&name=1%20Sport%20Courts%20ST%20(1).jpg)
Ready to get started?
When you’re equipped with quality paints and stencils, all that’s left is a little time and elbow grease to create something wonderful. Be sure to explore our range of Reusable Playground Stencils – complete with pre-measured paint kits – to make your project even easier. These kits take the guesswork out of how much paint you need and provide the right supplies for the job. If you have any questions or need a whole playground painting kit, don’t hesitate to contact our team for guidance. We’re here to help you bring your playground to life with fun games and activities.
Now that you know what kinds of paint are available for painting playground games and how to use them, it’s time to gather your materials and make that blacktop bloom with color and excitement. Happy painting – and even happier playing!


Leave a comment